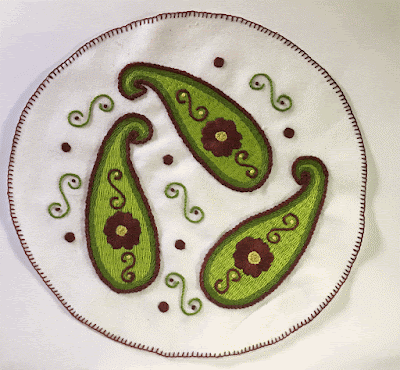
I did the darker green outline first to put an edge around the area to be filled in. Then I could follow the line around when doing the border. The outline and the center are filled with long and short stitch. As I worked in each line of stitches I drew the curl on top of the threads.

 In the original drawing I had a scalloped edge. A scalloped edge that size would take a long time to sew if I tried to fill them in. Instead I used the Portuguese knotted stem stitch. The round knots make a bumpy edge and it works up really quick. Being a knotted stitch it uses much more thread by the end I used two skeins of the purple thread.
 The flower petals are done in padded satin stitch. The center of the flower is edged in stem stitch with french knots inside. It worked better to sew in the petals and add the center afterwards. I tried it both ways and the one where I did the center first didn't look as nice. All the curls were done in stem stitch with french knots for the small dots inside. The large dots are done in the padded satin stitch.