Spring has sprung and we are getting a bit of rain here. The clouds looked like they would be interesting to embroider. I made a small sampler with a collection of different stylized clouds. I looked at pictures of embroidered and hand drawn clouds on the internet and came up with these four. The piece is 8 x 4 inches and each cloud is about 3 inches wide and 2 inches high. I used two strands of Anchor embroidery cotton 7050, 7051, 7052 and white.
 I did the cloud on the bottom first, it was going to be the fastest. I used a modern style of Sashiko embroidery using graduating colours. Sashiko is a Japanese type of embroidery traditionally done in all white thread using the running or darning stitch on an indigo background. The first row is three half circles wide. I graduated the colours from dark to light. The second row is two half circles wide and I graduated the colours from light to dark. The top row was one half circle in the middle with the colours going from dark to light like on the bottom row.
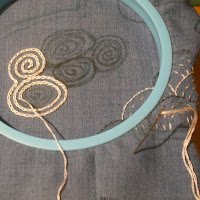
 The cloud on the left side is done in chain stitch spirals. I drew the outer edge of the cloud first. Then each rounded bump on the edge and formed them into circular shapes. Filling in as much of the space inside the cloud as possible. I drew and then stitched a spiral inside each round. I worked from the outside into the middle to be sure to get the outline the right shape. It is better to sew spirals from the center out to avoid puckering the fabric.
The cloud at the top has a swirly look to it. The solid filling made it the longest of all to do and it probably took as long to make this cloud as all the rest put together. I outlined the cloud first in back stitch, doing the white outside section first. Next I outlined the inside swirls graduating to the darkest colour in the center. I filled in the cloud with rows of back stitch as well. I had to make the stitches very small to make the tighter curves in the middle and the cloud looks a little flat. I think another stitch would have made the cloud stand out more and maybe would have been a lot faster. I like the way that it looks and want to try to using it again sometime.
 The cloud on the right side is striped. It was fairly quick to work but not as fast as the first two. I used an outline stitch to work the lines. I worked the outline first then tried to keep the lines inside evenly spaced.


